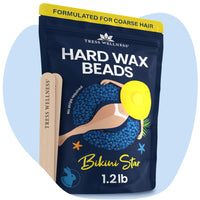
Dreaming of silky, smooth arms? You could totally pull off the professional arms waxing results at home. Let’s be honest, arm waxing is not the trickiest of businesses. It is fairly easy for self-waxing beginners and a great way to save the big bucks you spend in the salon. All you need is the Tress Wellness at-home waxing kit that comes with all the tools for at-home waxing, and you’re all set. So, if you’re wondering how to wax your arms at home, it is done in six easy steps.
But first, let’s take a few steps back starting from choosing the best arm waxing kit and prepping your skin before you wax your arms.
Pre-Wax Preparation
You need to do a few things before you start waxing your arms. This helps the wax stick more effectively to your legs and the removal is smooth and painless.
- Trimming the Trimmables: Before you even think about wax, make sure your arm hair is the right length—about 1/4 inch is the sweet spot. Too short, and the wax will snub your hair; too long, and you're in for an "ouch" moment.
- Exfoliation Station: Hop aboard the exfoliation train 24-48 hours before waxing your arms. This step is key for lifting those pesky ingrown hair and bidding farewell to dead skin cells, making for a smoother waxing voyage.
- Shower Power: On D-day, cleanse your skin with a refreshing shower. But, plot twist—skip the lotions and potions afterwards. You want your arms to be clean, and dry before waxing. This helps the wax stick to the hair effectively.
- Time It Right: Choose a time that lets you chillax afterward. Avoid waxing during or around your period because that heightens your skin sensitivity and makes it more painful. Trust us, your skin will thank you for the downtime.
Voila! Now you are all prepped for waxing your arms.
Waxing Your Arms in Six Easy Steps: A Guide
We have a blog on how to use the Tress Wellness Waxing Kit, check it out before getting started.

Step 1: Prep your skin
Your next step in the game is to prep your skin. This step makes sure that the wax sticks to your hair properly so that you get most of it off in one pull. The Tress Wellness pre-waxing spray does the job perfectly. Just do a couple of sprays for a closer waxing experience.
Step 2: Warm up your hard wax beads
Next comes warming up your hard wax beads. Take out your wax warmer and warm up your beads to 150-175 degrees Fahrenheit. Your wax should look something like warm and gooey honey.
Pro tip: Hard wax works best for waxing bigger areas like arms and legs. Hard wax is gentler on delicate skin and is less painful. Tress Wellness Wax Beads are FDA-approved, dermatologically tested and hypoallergenic.
Step 3: Scoop up the goodness and spread it thick
Next, we apply the wax gently on your arms. Pull your skin taut with two fingers, and use the other hand to spread the wax nice and thick. Go at least for two layers. This helps the wax stick to the hair properly. Apply your wax in the direction of the hair growth.
Step 4: Let It Set: Allow the wax to cool and harden on the skin. The time this takes can vary, but it's usually a few seconds to a minute. The wax should feel firm to the touch but not too brittle.
Step 5: Pull the layer off in one swift motion
Once the wax hardens on your skin, you need to pull it off. Do this in the opposite direction of the hair growth. You should pull it off in a swift motion. The longer you take to pull the strip out, the more it will hurt. If you feel a little tingling sensation on your skin, apply pressure on the area gently with your palm.
Step 6: Take good care post-waxing
Waxing is incomplete without the final step in the routine- aftercare. The waxing process gets your skin all riled up. Soothe it with the goodness of Tress Wellness after-waxing spray. It cleans up the wax residue and calms your skin down.
Here's a video tutorial on how to apply hard wax on your arm:
@tresswellness_waxingkit How to apply hard wax like a pro ✅ #waxing #hardwax #howtowax #waxingforbeginners #USA ♬ original sound - Tress Wellness Waxing Kit 💜
We do a bunch of blogs on waxing other body parts as well. Get your own guide to bikini waxing, Brazilian waxing, leg waxing, and face waxing. Check out all our blogs!
Frequently Asked Questions
1. Should I Wax My Arms?
Whether or not to wax your arms is a personal choice. Waxing can leave your arms feeling smooth for weeks, without the stubble that shaving leaves behind. It's a convenient option if you prefer longer-lasting results and smoother skin.
2. Does Waxing Arms Hurt?
Waxing your arms can give you a little stinging sensation, but it's generally tolerable. The level of discomfort varies from person to person and depends on your pain threshold. However, the pain is usually minimal and fleeting.
3. How to Wax Arms?
Start by cleaning your arms thoroughly to remove any dirt, oil, or lotion. Then, heat the wax according to the product instructions and apply it in the direction of hair growth using a spatula. Wait a few seconds for the wax to cool and harden. Finally, pull your skin taut and pull off the wax in the opposite direction of hair growth.
4. Does Arm Hair Grow Back Thicker after Waxing?
Contrary to popular belief, arm hair doesn't grow back thicker after waxing. In fact, waxing can lead to finer regrowth over time. When you wax, you're removing the hair from the root, which can weaken the hair follicle over repeated sessions, resulting in softer and finer hair
There you go, now put your hands up in the air!! Cause they’re all soft and waxed. Wasn’t that so easy? All you needed was some time, patience and some good waxing tools. We hope you’d try new body parts to wax next, and we have tutorials for all of them. Happy waxing!


