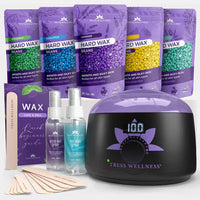
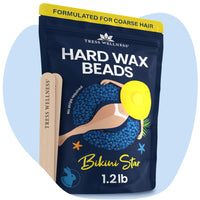
Cleaning your wax warmer doesn’t have to feel like a sticky nightmare. If you’ve ever dealt with wax that overflowed or hardened into an unmovable blob, you know the frustration is real. But don’t panic—I got you. Whether you're dealing with a little leftover wax or a full-on spill, I’ll walk you through the cleanup process step by step. Bonus tip? Tress Wellness’s After-Wax Spray is your secret weapon for dissolving stubborn wax like magic.
And if you’re wondering “should you get a wax warmer with a silicone bowl?” – the answer is YES. Trust me, you’ll thank yourself later.
Let’s dive into exactly how to clean your wax warmer and why Tress Wellness’s tools make the process effortless.
Why Bother Cleaning Your Wax Warmer?

Cleaning your wax warmer is more than just a “looks nice” thing. Regular cleaning helps:
-
Even Wax Heating – Leftover wax can mess with how your new wax melts.
-
Longer Warmer Life – Buildup can cause wear and tear.
-
Hygiene – Old wax can harbor bacteria. No thanks!
If you want smooth, even wax applications every time (and who doesn’t?), keeping your wax warmer clean is essential.
How to Clean Your Wax Warmer (Without the Stress)
What You’ll Need:
-
Paper towels or soft cloth
-
Wax warmer spatula
-
Isopropyl alcohol (for stubborn wax)
Step-by-Step Cleaning Instructions:
1. Turn Off and Let It Cool
Unplug your wax warmer and let it cool slightly. The wax should still be soft but not too hot to handle. This is the sweet spot for easy cleanup.
2. Remove Excess Wax
Use a spatula to scoop out as much wax as possible. If it’s hardened, briefly turn the warmer on to soften it up. Pour leftover wax into a silicone mold or toss it if it’s used up.
3. Spray and Wipe
Here’s where the magic happens. Grab your Tress Wellness After-Wax Spray and spritz the inside of the warmer generously. This spray is formulated to break down wax residue quickly. Let it sit for about 30 seconds, then wipe the area with a paper towel. Repeat if necessary.
4. For Stubborn Wax Spots
If there are still stubborn bits hanging around, use isopropyl alcohol and gently rub the residue away with a cloth. The After-Wax Spray usually does the trick, but alcohol is a great backup for those extra-tough spots.
5. Overflow Cleanup
How to clean a wax warmer that overflowed with wax?
-
Let the wax cool completely (trying to clean hot wax is a disaster waiting to happen).
-
Peel off as much as you can.
-
Spray the warmer and surrounding areas with the After-Wax Spray and wipe clean.
6. Final Touch
Once all the wax is gone, wipe down the entire warmer with a clean cloth to remove any oily residue from the spray. Voila—clean and ready for your next session!
Why Silicone Bowls Are a Must-Have?

Should you get a wax warmer with a silicone bowl? – Absolutely, and here’s why it will change your entire waxing experience.
A silicone bowl isn’t just a trendy accessory; it’s a game-changer for home waxing. Traditional wax warmers can be tricky to clean—wax hardens and sticks to the pot, and scraping it out can feel like chiseling cement. With a silicone bowl, those days are over. This flexible, non-stick material ensures wax peels out effortlessly, saving you time, effort, and frustration.
Plus, silicone bowls are heat-resistant and durable, making them the perfect companion for your wax warmer. Whether you're a beginner or a pro, the silicone bowl simplifies cleanup and helps maintain your wax warmer by preventing wax from coating the inside. It also keeps the pot free of residue, ensuring more even heating during future waxing sessions.
Imagine finishing your waxing session, letting the wax cool, and just peeling it out swiftly—no scraping or scrubbing. That’s the beauty of silicone.
Here’s why the Tress Wellness silicone bowl is a must-have for every waxing kit:
-
No More Scraping – Wax peels right out like magic.
-
Reheat and Reuse – Store leftover wax directly in the bowl. Need more wax? Just pop it back in the warmer.
-
Overflow? No Stress – Wax stays contained in the bowl, not stuck to your warmer.
-
Protects Your Warmer – Keeps your warmer clean and free of hard wax buildup, extending its lifespan.
-
Perfect Fit – Designed to fit snugly into the Tress Wellness wax warmer, ensuring seamless use.
If you love waxing at home and want to make life easier, investing in a silicone bowl is one of the best decisions you can make.
Pro Tip: Use After-Wax Spray Beyond Cleanup
The After-Wax Spray isn’t just for your warmer. After your waxing session, spritz it on your skin to soothe and remove any leftover wax from your body. It’s like a two-in-one product—clean warmer, clean skin.
Final Thoughts
How to clean your wax warmer doesn’t have to feel like an uphill battle. With the right tools (hello, After-Wax Spray and silicone bowl), it’s quick, easy, and mess-free. Whether you’re dealing with a little leftover wax or an overflow situation, regular cleaning will keep your wax warmer in tip-top shape.
So, the next time you’re deep into a DIY waxing session, just remember—wax happens, but cleaning it up doesn’t have to be hard.


