Want to get rid of upper lip hair? Upper lip waxing removes hair from the root for smooth, long-lasting results. In this guide, we cover how upper lip wax works, benefits, common concerns, tools, preparation, and aftercare. Learn how to safely wax your upper lip at home.
Key Takeaways
-
Upper lip waxing is a longer-lasting hair removal method that targets hair at the root, ensuring smoother skin compared to shaving.
-
Proper skin preparation and the right tools, like high-quality wax and spatulas, are crucial for effective waxing at home.
-
Aftercare is essential for maintaining smooth skin post-waxing; soothing lotions can reduce irritation, and avoiding sun exposure is key.
What is Upper Lip Waxing?

Upper lip waxing is a method that uses warm wax to remove hair from the root, providing a smooth and long-lasting finish. Unlike shaving, which only cuts hair at the surface, waxing targets the hair at the root, giving you a smoother and more refined finish. This approach is preferred for those looking for a longer-lasting solution to upper lip hair.
Whether you opt for a professional waxing session at a salon or decide to take matters into your own hands with a home waxing kit, upper lip waxing can yield impressive results. While professionals might offer more precision, at-home waxing is convenient and can be just as effective with the right tools and technique.
Here are the benefits of choosing lip waxing over other hair removal methods.
Benefits of Upper Lip Waxing
A major benefit of upper lip waxing is its longevity. Unlike methods like shaving or hair removal creams, the results from waxing can last up to several weeks, providing long-lasting smoothness. You can enjoy smooth skin for longer without constant maintenance.
Another significant advantage is the precision of hair removal that waxing offers. Waxing removes unwanted hair from the root, ensuring a cleaner and more refined appearance. Regular waxing can also lead to finer and sparser hair regrowth over time, reducing the frequency of waxing sessions needed.
Here are some common concerns associated with upper lip waxing.
Addressing Common Concerns
If you’re new to upper lip waxing, it’s common to have concerns. Common worries include pain, skin irritation, temporary redness, and bumps. However, discomfort often diminishes with regular sessions. Regular waxing can also reduce the rate of hair growth over time, which might alleviate some of the initial discomfort.
While professional waxing can sometimes lead to skin irritation or allergic reactions, proper technique and aftercare can help minimize these risks. Now, let’s discuss the tools needed for a successful waxing session.
Tools You Need for Upper Lip Waxing

Having the right tools is essential for the best results in upper lip waxing. Essential items include high-quality wax, precision spatulas for application, and soothing lotions for aftercare. Small spatulas can enhance precision when applying wax on the upper lip, targeting unwanted hairs more effectively.
Essential items for upper lip waxing include:
-
High-quality wax
-
Precision spatulas for application
-
Soothing sprays for aftercare
-
Small spatulas to enhance precision when applying wax on the upper lip, targeting unwanted hairs more effectively.
We highly recommend using Tress Wellness’s waxing kit, which is specially formulated for sensitive areas like the upper lip. Their golden hard wax beads are particularly well-suited for delicate skin, ensuring a smoother and more comfortable waxing experience.
Now that you have your tools ready, let’s discuss how to prepare your skin for waxing.
Preparing Your Skin for Waxing
Proper skin preparation is key to a successful waxing session. Start by cleansing and exfoliating to remove oils and dead skin cells, enhancing the wax’s effectiveness. Perform a patch test to check for allergic reactions, especially if you have sensitive skin.
Additionally, avoid using products containing retinol or glycolic acid before waxing as they can increase skin sensitivity. Here’s a breakdown of these steps.
Cleanse and Exfoliate
Cleansing and exfoliating the upper lip area is a crucial first step in preparing for waxing. This process helps remove dead skin cells and oils that can interfere with wax adhesion, promoting smoother and more effective hair removal. Gentle exfoliation a day or two before waxing can significantly improve the waxing process by reducing the likelihood of ingrown hairs.
Clearing away dead skin cells enhances the wax’s grip and leaves the skin smoother, which is especially beneficial for those with dry skin and promotes hair free skin. This preparation is crucial for optimal waxing results.
Patch Test
Performing a patch test is a precautionary measure that shouldn’t be overlooked. Apply a small amount of wax on a discreet area of your skin to check for any adverse reactions. This is particularly important for those with sensitive skin to identify any potential allergic reactions.
Avoid Certain Products
To minimize the risk of skin irritation during waxing, avoid using products containing retinol or glycolic acid several days before your session. These ingredients can heighten skin sensitivity, making the waxing process more uncomfortable. Stopping their use before waxing helps reduce the risk of irritation.
How to Wax Your Upper Lip at Home?

Waxing your upper lip at home can be a convenient and cost-effective way to maintain smooth skin. Start by gathering all the necessary tools, such as those from Tress Wellness’s waxing kit.
Follow these steps: heat the wax to the right temperature, apply it evenly, and pull the wax strip quickly. Here’s a detailed look at each step.
Heating the Wax
Properly heating the wax is crucial for effective hair removal. Use a wax warmer, following the instructions to ensure the wax reaches the right temperature and consistency. The wax should have a honey-like consistency before use, which ensures it adheres well to the hairs and removes them effectively. Applying the wax in this state allows for even coverage and better results.
Ensure the wax is not too hot to avoid burns and discomfort. With the wax ready, proceed to the application process.
Applying the Wax
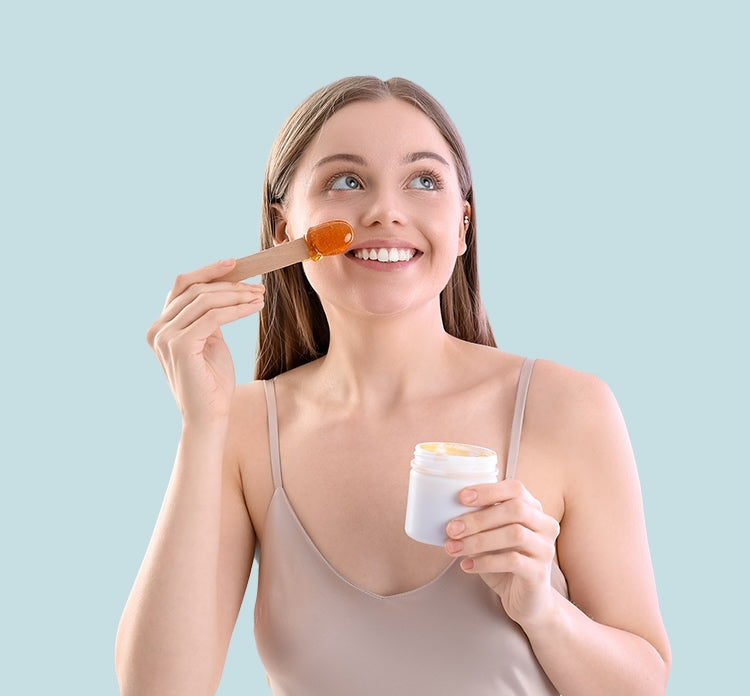
To wax your upper lip, start by applying a thin layer of wax in the direction of hair growth. This ensures that the wax grips the hairs effectively for easier removal. Use a spatula to spread the wax evenly across the upper lip area.
After the wax sets, place a wax strip over it and press firmly to ensure even coverage and optimal hair removal with wax strips. After the wax has adhered to the hairs, it’s time to pull the strip.
Pulling the Wax Strip
When pulling the wax strip, the key is to do it quickly and in the opposite direction of hair growth to minimize discomfort. Keeping the skin taut with one hand while pulling the strip with the other can significantly reduce pain and ensure a cleaner hair removal.
Remember, the pain from waxing is usually brief, lasting only about 0.2 seconds. Quick and decisive action ensures effective hair removal. With these steps, you can achieve a smooth, hair-free upper lip at home.
Aftercare for Upper Lip Waxing

Proper aftercare is essential to maintain the smoothness of your skin and prevent irritation. Soothing lotions like aloe vera gel can calm the skin and reduce redness after waxing. Regular waxing sessions every four to six weeks can help keep your skin hair-free and smooth.
Here are some specific aftercare steps.
Soothe and Moisturize
After waxing, your skin might be sensitive and in need of care. Applying a gentle moisturizer helps to close the pores and hydrate the skin, preventing dryness and irritation. Products like aloe vera gel are excellent for calming the skin and reducing any immediate redness or discomfort.
Regular moisturizing helps maintain smooth skin and prolong waxing results. Choose gentle, chemical-free products to avoid further irritation.
Avoid Sun Exposure
Your freshly waxed skin is more vulnerable to sun damage, so it’s crucial to avoid sun exposure for at least 24 hours post-waxing. Direct sunlight can cause irritation and even darken the sensitive skin on your upper lip.
Applying a calming lotion or oil can further reduce sensitivity and restore moisture. Aloe vera gel and other soothing products are particularly effective in reducing post-wax redness and inflammation.
Monitor for Redness
Monitor your skin for any signs of persistent redness or irritation after waxing. If you notice any prolonged redness, it might be an indication of an underlying issue that needs attention.
Avoid touching or rubbing the waxed area to prevent exacerbating any irritation. If redness persists, consider consulting a dermatologist for advice on how to manage and treat the irritation effectively.
Summary
Upper lip waxing is a highly effective method for achieving smooth, hair-free skin that lasts for weeks. By following the right steps and using the proper tools, you can easily perform upper lip waxing at home and enjoy the benefits of long-lasting smoothness. Regular waxing not only provides a cleaner appearance but also leads to finer and sparser hair regrowth over time.
With proper skin preparation and aftercare, you can minimize any discomfort and ensure a positive waxing experience. So, why not give upper lip waxing a try and enjoy the confidence that comes with a flawlessly smooth upper lip?
Frequently Asked Questions
How long do the results of upper lip waxing last?
Waxing your upper lip typically keeps it smooth for about three to six weeks, so you can enjoy that fresh feeling for a while!
What should I do to prepare my skin before waxing?
To prepare your skin for waxing, make sure to cleanse and exfoliate beforehand, and avoid any products with retinol or glycolic acid. This will help ensure smoother results and minimize irritation.
Is upper lip waxing painful?
Yes, upper lip waxing can be painful, but the discomfort often decreases with regular sessions and good technique. So, don’t let the initial pain scare you away!
How can I soothe my skin after waxing?
To soothe your skin after waxing, try applying aloe vera gel or a gentle moisturizer to calm redness and irritation. It really makes a difference!
Should I avoid sun exposure after waxing?
Absolutely, you should avoid sun exposure for at least 24 hours after waxing to protect your skin from irritation and damage. Your skin will thank you for it!


