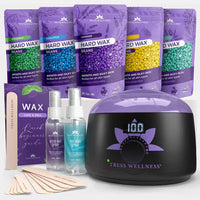
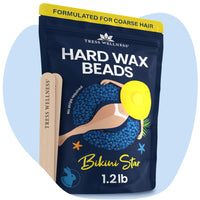
Hard wax beads make hair removal easier and less painful. They harden on hair, not skin. Discover their benefits and how to use them.
Key Takeaways
-
Hard wax beads are a stripless, less painful alternative to traditional waxes, suitable for sensitive areas like the face and bikini line.
-
They leave minimal residue, grip even short hairs effectively, and are ideal for coarse hair on areas such as the underarms and bikini line.
-
Proper preparation and aftercare, like cleansing and exfoliating before waxing and soothing and moisturizing the skin after, are crucial for a successful waxing experience.
What Are Hard Wax Beads?

Hard wax beads are a revolutionary form of stripless wax that have taken the hair removal world by storm. Unlike traditional waxes that require cloth or paper strips, professional hard wax beads harden over the hair follicles without sticking to the skin. This means you can simply peel them off by hand, making the process much less painful and more convenient. The beads come in various blends, including polymer film and non-polymer variants. Polymer blends are particularly favored for their elasticity and gentleness on the skin. A hard wax kit featuring these wax beads can make your hair removal experience even better.
What sets hard wax beads apart from other waxes, such as hard and soft wax, is their versatility and user-friendliness. These beads can be melted in a wax warmer and applied directly onto the skin. Once they harden, they form a strip that can be easily removed, pulling the hair out from the root without causing significant discomfort. Whether you’re looking to perform a brazilian wax or target sensitive areas like the face using soft wax, hard wax beads provide a seamless, pain-minimized waxing experience.
Benefits of Using Hard Wax Beads
One of the standout benefits of hard wax beads is their gentle application. Since the wax adheres to the hair rather than the skin, it results in significantly less pain compared to traditional soft waxes. This makes hard wax hair removal an excellent choice for those with sensitive skin or those who find waxing to be a painful ordeal.
Another major advantage is the minimal residue left on the skin after the waxing session. Hard wax beads typically leave less sticky residue, making the cleanup process much easier. Additionally, hard wax beads allow for treating and retreating areas without damaging the skin, which is a big plus if you need to go over a spot more than once.
Hard wax beads, also known as hard wax beans, are incredibly effective on short and coarse hair, making them ideal for areas like the bikini line, underarms, and face. Whether you’re performing a brazilian bikini wax or touching up your facial hair, hair removal wax in the form of hard wax beads can handle it all with ease. Their ability to grab even the shortest hairs ensures a smooth finish, leaving your skin silky and hair-free.
How to Choose the Right Hard Wax Beads
The selection of appropriate hard wax beads significantly influences your waxing experience. Should you possess sensitive skin or intend to wax sensitive areas such as your face or bikini line, go for hard wax beads specifically designed for sensitive skin. These types of hard waxes are more gentle and less likely to cause irritation.
For those with coarse or deep-rooted hair, it’s crucial to select hard wax beads that are designed to tackle tough hair. These beads are more effective at gripping and removing coarse hair, ensuring a thorough and smooth result. Also, consider the area you’re waxing; for facial and intimate areas, hard wax is generally preferred due to its gentle application and effective removal process.
Preparing for a Waxing Session

Successful waxing hinges on thorough preparation. Ensuring that your skin is clean and exfoliated, gathering all necessary supplies, and testing the wax temperature are crucial steps to achieve the best results.
Let’s break down each of these steps to help you get ready for a smooth and effective hair removal session.
Cleanse and Exfoliate
Prior to waxing, it’s vital to purify your skin from oils, lotions, or any impurities. Use a gentle cleanser to ensure the area is completely clean and free from any substances that might interfere with the wax’s adhesion. Ensure the intended area is dry before the waxing commences, as this enhances the wax’s grip on the hair.
Exfoliating your skin 1-2 days before your waxing session is equally important. This process removes dead skin cells and reduces the risk of ingrown hairs. Use a gentle exfoliator, like a loofah or exfoliating gloves, to avoid irritation. By preparing your skin properly, you’ll ensure a smoother waxing experience and better results.
Gather Your Supplies
It’s imperative to have all your supplies at hand before initiating your waxing session. Make sure you have a professional wax warmer to melt the hard wax beads evenly and maintain the right temperature throughout the process. A reliable wax warmer with adjustable temperature settings will ensure your wax remains at the perfect consistency for application.
In addition to wax warmers, you’ll need applicator sticks for applying the wax, and a clean space where you can comfortably perform the waxing. Having everything set up and within reach will make your waxing session more efficient and less stressful.
Test the Wax Temperature
Testing the hard wax temperature is an essential step to avoid burns and ensure effective hair removal. Heat the wax in a wax warmer or microwave until it reaches a consistency similar to honey. Always ensure the wax is at a comfortable temperature; too hot, and it can burn your skin, too cold, and it won’t spread properly or remove hair effectively.
Before applying the wax to a larger area, test it on a small patch of skin, such as your wrist, to check its temperature. This ensures that the wax from the wax pot is warm but not too hot, providing a safe and comfortable waxing experience.
Step-by-Step Guide to Waxing with Hard Wax Beads

With preparation out of the way, here is a detailed guide to waxing with hard wax beads. This comprehensive guide will elucidate on melting the beads, wax application, and effective removal, resulting in smooth, hair-free skin.
Melt the Hard Wax Beads
Start by pouring the hard wax beads into the warming chamber of your wax warmer. Set the temperature to the highest setting for 10-15 minutes to melt the beads initially. Stir the wax occasionally to ensure it melts evenly and reaches a honey-like consistency. The wax should not be too cold, as it might not work effectively.
Check the consistency of the wax, which should resemble molasses or thick honey, before using it for waxing. This ensures that the wax will spread smoothly and adhere properly to the hair for effective removal.
Apply the Wax
Using a wooden applicator stick or spatula, apply a thick layer of melted wax in the direction of hair growth. This helps ensure that the wax adheres properly to the hairs, making removal more effective. Be sure to apply the wax thick enough, as a thin layer might break during removal.
Leave a thicker edge at the end of the application to make removal easier. This “lip” will give you a good grip when it’s time to pull the wax off, ensuring a smoother and more effective hair removal process.
Here's how you should apply your hard wax at home:
@tresswellness_waxingkit How to apply hard wax like a pro ✅ #waxing #hardwax #howtowax #waxingforbeginners #USA ♬ original sound - Tress Wellness Waxing Kit 💜
Remove the Wax
Once the wax has hardened, typically within five minutes, it’s time to remove it. Wait until the wax feels tacky but not sticky, then grip the edge of the strip you created and pull it off quickly in the opposite direction of hair growth. This ensures that all the hair is removed from the root.
Hold the skin taut while removing the wax to minimize discomfort. Applying pressure immediately after removing the wax can also help reduce any pain or sensitivity. This technique ensures a smooth and effective hair removal process.
After-Waxing Care
Post-waxing, appropriate aftercare is indispensable to calm the skin and sustain smooth results. This includes calming the waxed area, abstaining from sun exposure, and consistent moisturizing.
Let’s explore these steps in detail to ensure your skin remains healthy and irritation-free.
Soothe the Waxed Area
Applying the Tress Wellness after-wax spray can soothe the skin and reduce irritation after waxing. Aloe vera gel, in particular, is known for its healing properties and should be applied to the waxed area for at least five days post-session. Hydrocortisone cream with a concentration of 1% or less can also help soothe irritated skin.
Cold compresses are another effective way to reduce sensitivity in waxed areas. Applying a cold compress can help calm the skin and alleviate any discomfort you might feel after waxing.
Avoid Sun Exposure
It’s crucial to avoid direct sunlight and tanning beds for at least 48 hours after waxing to protect your sensitive skin. Exposure to the sun can lead to hyperpigmentation and other skin issues, so make sure to keep the waxed area covered and avoid prolonged sun exposure.
This precaution ensures your extremely sensitive skin heals properly and remains irritation-free.
Moisturize Regularly
Keeping your skin moisturized after waxing is vital to maintain its health and elasticity. Use non-comedogenic moisturizers to avoid clogging pores and ensure your skin stays hydrated. Gentle moisturizers help prevent the skin from drying out, reducing the risk of irritation and promoting overall skin health.
Hydrated skin is more resilient and less prone to post-waxing irritation. Make it a habit to moisturize regularly to keep your skin smooth and supple, enhancing the results of your waxing sessions.
Summary
In summary, hard wax beads offer a convenient and effective solution for at-home hair removal. Their gentleness on the skin, minimal residue, and effectiveness on various hair types make them a superior choice for many. By choosing the right beads, preparing properly, and following the correct waxing techniques, you can achieve salon-quality results at home.
Remember, aftercare is just as important as the waxing process itself. Soothe your skin, avoid sun exposure, and moisturize regularly to maintain smooth, healthy skin. With these tips and techniques, you’re well on your way to a seamless and satisfying waxing experience. Ready to give it a try?
Frequently Asked Questions
What are hard wax beads?
Hard wax beads are a stripless wax that hardens over hair follicles, making hair removal less painful without the need for material strips.
Are hard wax beads suitable for sensitive skin?
Yes, hard wax beads are suitable for sensitive skin because they adhere to the hair rather than the skin, making them gentler on sensitive areas like the face and bikini line.
How do I choose the right hard wax beads?
Choose hard wax beads based on your skin sensitivity and hair type, opting for gentle formulations for sensitive skin and beads designed for tough hair removal for coarse hair. Happy waxing!
How should I prepare my skin before waxing?
Before waxing, make sure to cleanse and exfoliate your skin to remove oils and dead skin cells, and ensure the area is dry before starting.
What should I do after waxing to care for my skin?
After waxing, you should soothe the area with aloe or calming creams, avoid sun exposure for 48 hours, and moisturize regularly to maintain healthy, irritation-free skin.


