Tired of spending money on salon visits just to tame those unruly brows? Or maybe you’ve had one too many awkward eyebrow mishaps at the hands of a stranger wielding hot wax? Good news: taking control of your brows at home is easier than you think!
With the right tools, a little patience, and a step-by-step guide, you can say goodbye to over-plucked disasters and hello to salon-worthy arches. So, grab your wax warmer and channel your inner beauty guru—it’s time to turn your bathroom into a brow-taming headquarters! Let’s dive in and make your DIY brow dreams come true.
Tools You Need for Waxing Eyebrows at Home

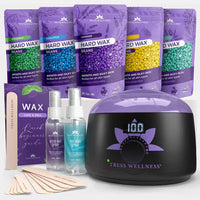
Before you dive into DIY eyebrow waxing, make sure you have the right tools on hand. Think of this as your brow-perfecting arsenal—each item plays a crucial role in achieving salon-quality results. No one wants to end up with uneven brows or a sticky mess, so here’s what you’ll need to nail your at-home waxing game.
- Eyebrow Waxing Sticks: These small, precise sticks help you apply wax accurately. Tress Wellness has eyebrow waxing sticks that are perfect for the job.
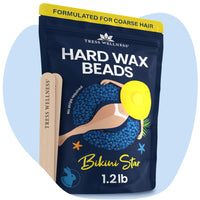
- Hard Wax Beads: Opt for gentle, hypoallergenic hard wax, like Tress Wellness’s formula, perfect for sensitive facial areas.
- Wax Warmer: A compact wax warmer ensures your wax is heated to the perfect temperature.
- Pre-Wax Spray: Cleanses and preps your skin for a smooth application.
- Post-Wax Spray or Aloe Vera Gel: Soothes the skin and minimizes irritation after waxing.
- Eyebrow Brush and Spoolie: These tools help shape your brows and keep them in place during waxing.
- Small Scissors: For trimming any longer brow hairs before waxing.
- Tweezers: For plucking stray hairs post-wax.
How to Prep for Eyebrow Waxing at Home?

Great brows start with proper prep! Taking the time to ready your skin before waxing isn’t just a step—it’s the secret to smooth, precise results and less post-wax drama. Think of it as laying the groundwork for your best brow moment yet. Here's how to get your skin primed and ready for a flawless waxing session.
- Clean Your Face: Wash your face with a gentle cleanser to remove makeup, dirt, and oils.
- Exfoliate the Brow Area: Gently exfoliate around your brows a day or two before waxing to remove dead skin cells.
- Trim Overgrown Brows: Use a spoolie to brush your brows upward and trim any excessively long hairs with scissors.
- Use Pre-Wax Spray: Apply pre-wax spray to clean and prep the skin around your brows.
- Plan Your Shape: Use a pencil or brow stencil to outline your desired brow shape, ensuring you don’t over-wax.
Step-by-Step Guide to Waxing Eyebrows at Home
Ready to turn your brow game up a notch? With a little patience and the right technique, you can achieve salon-worthy results from the comfort of your home. Follow these simple steps to shape, style, and slay your brows like a pro. Let’s get started!
Step 1: Heat the Wax
Melt your hard wax beads in a wax warmer until the consistency is similar to honey. Test the wax temperature on your wrist to ensure it’s warm but not too hot.
Step 2: Test for Reactions
Apply a small amount of wax on a different part of your skin to check for allergic reactions or sensitivity. Wait 24 hours before waxing your brows.
Step 3: Outline Your Brows
Use a pencil to outline your desired brow shape. This helps avoid removing too much hair.
Step 4: Apply the Wax
Dip a small waxing stick into the warm wax and apply it in the direction of hair growth. Be precise and only wax areas outside your outline.
Step 5: Remove the Wax
Let the wax cool and harden for a few seconds. Then, hold your skin taut and quickly pull the wax off in the opposite direction of hair growth.
Step 6: Repeat if Necessary
If some hairs remain, reapply the wax to those areas. Avoid going over the same spot more than twice to prevent irritation.
Step 7: Tweeze Strays
After waxing, use tweezers to remove any stray hair that the wax missed.
Aftercare for Eyebrow Waxing at Home

Proper aftercare ensures your skin stays healthy and irritation-free:
- Apply Post-Wax Spray: Use a soothing post-wax spray or aloe vera gel to calm the skin and reduce redness.
- Avoid Heat and Sweat: For 24 hours, skip saunas, hot showers, and intense workouts to prevent irritation.
- Skip Makeup: Avoid applying makeup to the waxed area for at least 24 hours.
- Moisturize Regularly: Keep the skin hydrated with a gentle, non-comedogenic moisturizer.
- Stay Out of the Sun: Protect your freshly waxed skin from UV exposure to avoid discoloration.
Tips for Perfect Brows Every Time
Getting flawless brows doesn’t have to be hit-or-miss. With a few insider tricks up your sleeve, you can nail the perfect arch every single time. From shaping secrets to avoiding common mistakes, these tips will ensure your brows stay on point.
- Start Small: If you’re new to eyebrow waxing, remove small sections at a time to avoid over-waxing.
- Work in Good Lighting: A well-lit area helps you see every detail for precise shaping.
- Maintain Regularly: Wax your brows every 3-4 weeks to keep their shape intact.
- Know When to Stop: Over-waxing can thin out your brows, so stick to your pre-drawn outline.
And there you have it—your ultimate guide to at-home eyebrow waxing! With the right tools, some prep work, and a steady hand, you’ll be rocking salon-level brows without ever leaving your house (or putting on pants). Remember, practice makes perfect, so don’t stress if your first attempt isn’t Insta-ready. Just keep at it, follow these tips, and soon you’ll be the Beyoncé of brow waxing—flawless, confident, and totally in control. Now go forth and slay those arches!


