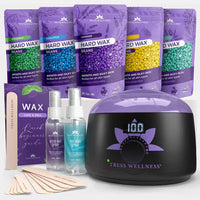
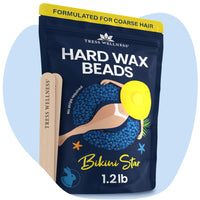
Dreaming of silky, smooth arms? You could totally pull off the professional arms waxing results at home. Waxing your arms at home can be a cost-effective and convenient way to achieve smooth, hair-free skin. With a little preparation and the right technique, you can get salon-quality results in the comfort of your own home. Follow these seven easy steps to wax your arms like a pro.
Step 1: Gather Your Supplies

Before you start, make sure you have all the necessary supplies for arm waxing:
- Arm waxing kit (wax, wax warmer, and spatula)
- Pre-wax spray or baby powder
- Post-wax soothing spray or aloe vera gel
- Exfoliating scrub
- Moisturizer
- Mirror (optional, for better visibility)
Step 2: Prepare Your Skin
Preparation is key to a successful waxing session. Start by exfoliating your arms a day or two before waxing to remove dead skin cells and reduce the risk of ingrown hairs. On the day of waxing, clean your arms thoroughly with a pre-wax cleanser to remove any oils, lotions, or dirt. If you don't have a pre-wax cleanser, you can use baby powder to ensure the skin is dry and free of moisture.
Step 3: Warm the Wax
Follow the instructions on your arm waxing kit to heat the wax to the recommended temperature. It's essential that the wax is warm enough to spread easily but not too hot to burn your skin. Most wax warmers have a temperature control, so adjust it accordingly and test a small amount on your wrist to check the temperature.
Step 4: Apply the Wax

Using a spatula, apply a thin layer of wax in the direction of hair growth. Work in small sections, as this makes the process more manageable and less painful. Ensure the wax layer is even and smooth for the best results. Avoid applying too much wax, as this can make it harder to remove and more painful.
Step 5: Remove the Wax
Place a cloth strip over the waxed area, pressing it down firmly and smoothing it in the direction of hair growth. Hold your skin taut with one hand and, with the other hand, quickly pull the strip off in the opposite direction of hair growth. Pulling the strip parallel to your skin, rather than upwards, helps reduce pain and irritation. Repeat this process until all the arm hair is removed.
Here's how you should apply and remove wax:
@tresswellness_waxingkit How to apply hard wax like a pro ✅ #waxing #hardwax #howtowax #waxingforbeginners #USA ♬ original sound - Tress Wellness Waxing Kit 💜
Step 6: Soothe Your Skin
After waxing, your skin may be red and sensitive. Apply a post-wax soothing lotion or aloe vera gel to calm and hydrate the skin. These products help reduce redness, irritation, and any potential bumps. Avoid using heavily fragranced products immediately after waxing, as they can further irritate the skin.
Step 7: Maintain Smooth Skin

To keep your arms smooth and hair-free for longer, moisturize your skin daily. Regular exfoliation, about 2-3 times a week, helps prevent ingrown hairs and keeps your skin looking fresh. Avoid sun exposure, hot showers, and tight clothing for at least 24 hours after waxing to allow your skin to recover fully.
Final Tips
- If you're new to waxing arm hair, consider doing a patch test on a small area of your arm to ensure you don't have an adverse reaction to the wax.
- If you have sensitive skin, look for wax specifically designed for sensitive areas.
- Take your time and be patient; rushing can lead to missed spots and uneven results.
By following these seven easy steps, you can achieve smooth, hair-free arms at home without the need for expensive salon visits. With the best arm waxing kit, you'll be able to maintain smooth and beautiful arms effortlessly. Happy waxing!


