Achieving a salon-quality Brazilian wax at home can seem daunting, but breaking the process into sections makes it manageable and effective. Here’s your step-by-step guide on how to do a Brazilian wax in sections for smooth, professional results. We will focus on specific areas such as the top section (pubic bone), the sides, the middle section (above the labia), the labia, and finally the back section (perineum and between the buttocks). This segmented approach ensures thorough hair removal and a less intimidating experience.
Step 1: Gather Your Supplies
Before you begin, ensure you have all the necessary supplies. You’ll need a high-quality waxing kit, like the Tress Wellness Waxing Kit, which includes:
- Hard wax beads
- Pre-wax spray
- Post-wax spray
- Applicator sticks
- Wax warmer
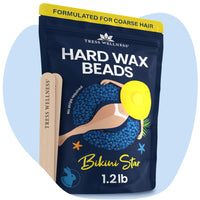
Tress Wellness Bikini Star Beads is specially formulated for bikini and Brazilian wax. Choosing this will make your Brazilian wax an easy breezy journey.

Additionally, have baby powder, clean cotton pads, and aloe vera gel ready for aftercare.
Step 2: Prepare Your Skin
Clean and prepare your skin thoroughly with the pre-wax spray to remove any oils, lotions, or sweat. Dry the area completely and apply a light dusting of baby powder to help the wax adhere to the hair, not the skin, reducing discomfort.
Step 3: Heat the Wax
Follow the instructions on your Tress Wellness Waxing Kit to heat the wax to the right consistency. It should be warm, thick, and honey-like, not too hot to avoid burns but warm enough to spread easily.
Step 4: Test the Wax Temperature
Before applying the wax to sensitive areas, test a small amount on the inside of your wrist. This ensures the wax is at a safe temperature and won’t cause burns.
Step 5: Waxing the Top Section

Start with the top section of the pubic bone. Here’s how to do a Brazilian wax at home, starting with this area:
- Apply Wax: Using an applicator stick, spread the wax in the direction of hair growth, covering a small area about 2-3 inches wide. Leave a thicker edge at the end of the strip for easier removal.
- Remove Wax: Once the wax has cooled but is still pliable (about 20-30 seconds), hold your skin taut and quickly pull the wax off in the opposite direction of hair growth. This motion should be quick and smooth to minimize pain and increase hair removal efficiency.
Step 6: Waxing the Sides

Next, move to the sides of the pubic area. Work from the outer edges towards the inner thighs, focusing on one side at a time.
- Apply Wax: Apply wax in small sections, about 2 inches wide, following the direction of hair growth. Make sure to apply it evenly and leave a thicker edge for pulling.
- Remove Wax: Hold the skin taut and pull the wax strip off quickly in the opposite direction of hair growth. Repeat on the other side.
Step 7: Waxing the Middle Section

Wax the area just above the labia. This area is more sensitive, so be gentle and precise.
- Apply Wax: Apply a small amount of wax in the direction of hair growth. Spread it thinly but evenly, focusing on one small section at a time.
- Remove Wax: Once the wax has set, hold the skin taut and pull off the wax in the opposite direction of hair growth. Work carefully to ensure all hair is removed.
Step 8: Waxing the Labia

Handle the labia area with extra care, as it is very sensitive.
- Apply Wax: Apply wax in smaller strips, about 1-2 inches wide. Work on one side at a time, applying the wax in the direction of hair growth.
- Remove Wax: Quickly pull the wax strip off in the opposite direction of hair growth, holding the skin taut. Repeat on the other side.
Step 9: Waxing the Back Section

Finally, address the perineum and the area between the buttocks.
- Apply Wax: Apply wax in small, manageable sections. Use a mirror for better visibility if needed, or ask for assistance.
- Remove Wax: Pull the wax off in the opposite direction of hair growth, keeping the skin taut.
Step 10: Soothe the Skin
Immediately after removing the wax, press down on the skin to soothe the area and reduce pain. Use the post-wax oil included in your Tress Wellness Waxing Kit to remove any wax residue and calm the skin. Follow up with aloe vera gel to moisturize and reduce inflammation.
Step 11: Aftercare Tips
Avoid tight clothing, hot showers, and excessive sweating for the next 24 hours to prevent irritation. Gently exfoliate the area a couple of days after waxing to prevent ingrown hairs. Continue moisturizing daily to keep your skin smooth and healthy.
Extra Tips for a Smooth Brazilian Wax Experience
- Trim Hair to the Right Length: Hair should be about a quarter-inch long for the wax to grip properly. If it’s too long, trim it down before you start.
- Stay Calm and Relaxed: Tension can increase discomfort. Take deep breaths and try to stay relaxed throughout the process.
- Consistency is Key: The more regularly you wax, the finer and sparser your hair will become over time, making the process easier and less painful.
By following these steps and working in sections, you can achieve a smooth, professional-quality Brazilian wax at home. Understanding how to do a Brazilian wax in sections makes the process less intimidating and more effective. With the right tools and technique, you’ll be a pro in no time. Enjoy your smooth, beautiful skin!


