Battling wax build-up in your wax warmer can be frustrating. Learn efficient cleaning techniques that make your warmer look and work like new. We cover everything from the quick removal of old wax to preventative measures that save time and effort. Dive into easy steps that guarantee a spotless wax warmer ready for your favorite scents.
Key Takeaways
-
Proper maintenance of a wax warmer is crucial for its longevity and efficiency, involving regular cleaning with cloths, mild cleaners, and isopropyl alcohol to maintain its appearance and optimal scent experience.
-
Swift wax removal can be achieved through techniques like The Solid Snap Technique for hardened wax and The Meltdown Method for liquid residue, complemented by a thorough cleaning to remove remaining wax residue.
-
Maintaining the quality and longevity of wax melts involves using high-quality natural waxes, proper storage, careful portioning, and optimal warmer placement, while proactive spill prevention and understanding the dos and don’ts of wax warmer care are essential for a safe scenting experience
Understanding Your Wax Warmer

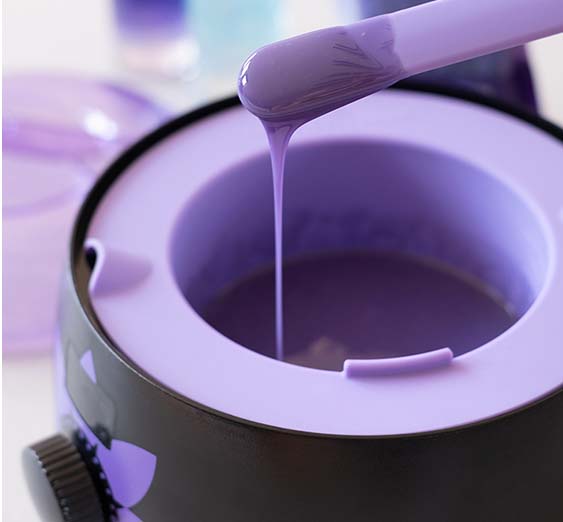
Wax warmers, essential tools in the beauty industry, are designed to efficiently melt hard wax for hair removal procedures. Good quality wax warmers offer LED indicator and adjustable temperature settings, which allow for precise control over the wax consistency, ensuring optimal application and effective hair removal. Salon-grade wax warmers, like the Tress Wellness wax warmer, are typically more robust and are engineered to maintain the wax at a consistent temperature for extended periods, which is crucial for busy salons that service a high number of clients throughout the day.
The Essential Guide to Wax Warmer Maintenance
A well-maintained wax warmer not only preserves its appearance but also guarantees an optimal scent experience. Regular cleaning prevents the build-up of all the wax residue that can lead to spills and maintains the full fragrance of new scented wax melts.
Here are some tips for cleaning a wax warmer:
-
Wipe the exterior with a damp cloth.
-
For stubborn stains, use a mild cleaner or a mixture of water and vinegar.
-
For a thorough clean, use any alcohol-based cleanser for the final wipe down.
By following these cleaning tips, you can ensure that your wax warmer stays in great condition and provides a delightful scent experience.
A good rule of thumb is to clean your wax warmer at least once a month, or whenever you’re changing wax melts. Wax tarts generally last a few days with heavy use before starting to lose their aroma. After cleaning, let all components dry completely before reassembling. This not only removes debris but also keeps your appliance working efficiently.
Swift Wax Removal Tactics
Cleaning a wax warmer doesn’t have to be a daunting task. Several swift wax removal tactics can make the process quick and efficient. Whether the wax is still in a semi-liquid state or has hardened into a solid piece, these removal tactics can come in handy and help maintain a clean wax warmer.
Two of the most effective techniques to explore are The Solid Snap Technique and The Meltdown Method.
The Solid Snap Technique
The Solid Snap Technique is a quick, efficient, and environmentally friendly method for removing hardened wax from your warmer. No need for chemicals or excessive scraping! This technique leverages the properties of wax and the magic of temperature to do the job.
How is it done? You can either place the wax warmer dish in the freezer and let the cool temperatures shrink the solidified wax, making it easier to pop out after 10-15 minutes, or use the Ice Queen method, which involves placing an ice cube on the hardened wax for a few minutes to shrink it for easy removal. But remember, in the case of electric wax warmers, only the detachable dish should be cooled to avoid damaging the entire unit.
Once the wax hardens, a plastic scraper or spoon can be used to carefully remove wax by popping out the solidified wax.
The Meltdown Method
While the Solid Snap Technique is great for hardened wax, the Meltdown Method shines when dealing with liquid wax. Heat the wax to a higher setting than typically used for melting, which will thin the consistency and help prevent the wax from sticking to the sides of the warmer.
You can dispose of melted wax from a wax warmer using one of the following methods:
-
Pour-out method: Pour the liquid wax directly into the garbage, avoiding drain clogs.
-
Cotton ball/pad method: Use cotton balls or a cotton pad to absorb the melted wax, facilitating clean and touch-free disposal.
-
Wipe the warmer dish: After disposing of the wax, wipe the warmer dish with a paper towel to ensure complete cleanliness.
Pristine Clean: Cleaning off the Wax Residue
While swift removal tactics can clear the bulk of the wax, it’s important to complement them with a thorough cleaning process to eliminate any remaining wax residue. This step is vital to maintain the pristine finish of your warmer and to prepare it for the next round of scented wax.
How do you attain that pristine clean? Let’s explore the Gentle Scrub and Alcohol Wipe methods.
The Gentle Scrub
The Gentle Scrub is a simple yet effective method to clean your wax warmer. Here’s how to do it:
-
Ensure the wax warmer has cooled completely before attempting to clean it to prevent any burns.
-
Spritz a few pumps of the Tress Wellness After-Waxing Spray as it helps get some of the wax off the warmer. Wipe down the bowl with a clean cloth.
-
Next using a soft sponge or cloth alongside warm soapy water, gently scrub the warmer.
-
This method won’t damage the wax warmer and can tackle even the most stubborn wax residues.
If your wax warmer has removable parts, it’s a good idea to detach them for easier cleaning. Once you’ve finished scrubbing, thoroughly rinse and dry all pieces before reassembling the wax warmer for future use.
The Alcohol Wipe
For a quick and efficient cleanup, the Alcohol Wipe method works like a charm. Using a paper towel or cotton ball soaked in rubbing alcohol, you can dissolve stubborn wax residue on wax warmers. Whether it’s stubborn wax or stains from the interior of the wax melter, rubbing alcohol can handle it all.
This method is not only effective for the interior of the warmer but also for cleaning external wax residue. Simply wipe down the edges of the wax warmer with a cloth dampened with isopropyl alcohol. Not only is rubbing alcohol a quick and effective cleaner for wax warmers, but it also evaporates quickly, leaving no residue behind.
@tresswellness_waxingkit What would you do? #cleaningwaxpot #howtocleanwaxpot #dirtywaxpot #hardwax #waxing #waxingforbeginners #waxkit #USA ♬ Le Monde - From Talk to Me - Richard Carter
Silicone Liner to Prevent Wax Spillage

Just like with anything else, prevention is better than cure when it comes to wax warmers. Proactive spill prevention can save you from a lot of mess and hassle. One easy way to do this is by using wax melt liners or silicone poppers in the dish. This prevents wax from directly touching the dish, facilitates easier cleanup, and helps prevent spills. The Tress Wellness silicone liner is specifically designed for this purpose, offering a perfect fit for your wax warmer and ensuring that wax can be removed effortlessly in one go without any scraping or residue.
Adding a wax warmer liner can also increase the wax warmer’s capacity slightly, allowing for more wax without the risk of overflowing.
Lastly, always monitor the wax warmer during operation to prevent overflows or spills, and avoid leaving the warmer overnight to reduce the risk of accidents.
The Do's and Don'ts of Wax Warmer Care
Finally, some do's and don'ts to keep in mind include.
Wax warmer do's:
-
Place the warmer on a level surface.
-
Keep the wax warmer away from children.
-
The wax warmer should always be under supervision when it’s on.
-
Turn off and unplug the warmer when not in use.
-
Use the warmer only for its intended use- melting wax.
Wax warmer don’ts:
-
Don’t place the wax warmer on or near water or any liquid.
-
Don’t keep the wax warmer cord on or near heated surfaces.
-
Don’t reach for the wax warmer if it falls into the water. Instead, unplug it immediately.
-
Attachments not recommended by the manufacturer may cause hazards.
DO NOT operate the device if:
-
The cord is damaged.
-
The outer body is damaged.
-
The inner metal bowl is damaged.
-
The warmer was dropped into the water.
In conclusion, maintaining a clean wax warmer is essential for smoother wax melts and ensuring hygienic waxing practices at home. Regular cleaning and proper maintenance not only extend the life of your wax warmer but also improve its efficiency in melting wax evenly. This results in a more pleasant waxing experience and preserves the integrity of the wax for safe home use. By following the outlined cleaning methods and maintenance tips, you can keep your wax warmer in perfect condition, making every waxing session as effective and hygienic as the first. Learn more about how to use our waxing kit properly, the perfect wax temperature, how to use the Tress Wellness Waxing Kit, and the silicone wax bowl from our blogs.


