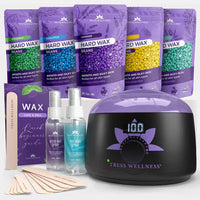
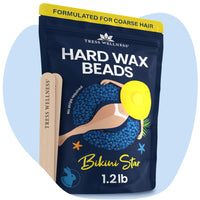
Using a waxing kit at home can be a convenient and cost-effective way to achieve smooth, hair-free skin. However, without proper knowledge and technique, it's easy to make mistakes that can lead to less-than-desirable results. In this guide, we'll explore some common mistakes to avoid when using your Tress Wellness waxing kit at home. By learning from these pitfalls, you can ensure a successful waxing experience and silky-smooth skin every time.
Skipping Patch Testing

Before diving into your waxing session, it's crucial to perform a patch test, especially if you're using a new wax formula or have sensitive skin. This simple step can help you avoid allergic reactions or skin irritations. Apply a small amount of wax to a small area of skin and wait for 24 hours to check for any adverse reactions. Don't skip this step, as it can save you from potential discomfort and complications later on.
Ignoring Skin Preparation
Proper skin preparation is key to a successful waxing session. Skipping exfoliation or failing to cleanse the skin thoroughly can lead to poor wax adhesion and uneven hair removal. Before waxing, gently exfoliate the skin to remove dead skin cells and ensure that the wax adheres properly to the hair follicles. Follow up with a gentle cleanser to remove any dirt, oil, or residue that may hinder the waxing process.
Applying Too Much Wax
Using more wax than necessary is a common mistake that can result in messy and inefficient waxing. With Tress Wellness waxing kits, a little goes a long way. Apply a thin, even layer of wax in the direction of hair growth, using the provided spatula. Avoid applying thick layers of wax, as this can make it harder to remove and increase the risk of skin irritation. Start with a small amount of wax and add more if needed, but remember that less is often more when it comes to waxing.
Pulling Wax Incorrectly
The way you pull the wax strips plays a crucial role in the effectiveness and comfort of the waxing process. Always pull the wax strips quickly and firmly in the opposite direction of hair growth, keeping the skin taut with your free hand. Avoid pulling the strips upwards or parallel to the skin, as this can cause unnecessary pain and discomfort. With Tress Wellness waxing kits, the wax strips are designed for easy and precise removal, so trust the process and pull confidently for the best results.
Here's how you apply wax on your skin:
@tresswellness_waxingkit Waxing for beginners - what did we miss though? 👀 #howtowax #howtowaxathome #waxing #waxingtutorial #hardwax #legwax #USA ♬ original sound - Tress Wellness Waxing Kit 💜
Neglecting Aftercare
Aftercare is just as important as the waxing process itself in ensuring smooth, healthy skin post-waxing. Neglecting aftercare can lead to irritation, ingrown hairs, and other skin issues. After waxing with your Tress Wellness waxing kit, soothe the skin with a gentle after-wax lotion or oil to calm redness and inflammation. Avoid hot baths, saunas, or vigorous exercise for at least 24 hours after waxing to prevent further irritation. Additionally, exfoliate the skin regularly to prevent ingrown hairs and maintain smoothness between waxing sessions.
Not Cleaning Your Waxing Supplies
Maintaining clean waxing supplies is essential for a hygienic and effective waxing experience. Failing to clean your waxing pot, spatulas, and other tools can lead to the buildup of bacteria and germs, increasing the risk of skin infections. After each waxing session, thoroughly clean your waxing supplies with warm water and soap, or use specialized cleaning solutions designed for waxing equipment. Ensure that your supplies are completely dry before storing them to prevent mold and mildew growth.
How to Clean Your Waxing Supplies:
Properly cleaning your waxing supplies is essential for maintaining hygiene and prolonging the life of your equipment. Here's a step-by-step guide to cleaning your Tress Wellness waxing supplies:
- Disassemble Your Equipment: Start by disassembling your waxing kit, including the wax pot, spatulas, and any other accessories.
- Remove Excess Wax: Use a paper towel or cotton pad soaked in warm water to remove any excess wax from the wax pot and spatulas. Be gentle to avoid damaging the equipment.
- Wash with Warm, Soapy Water: Fill a sink or basin with warm water and add a few drops of mild soap or dish detergent. Wash each piece of equipment thoroughly, using a soft cloth or sponge to remove any remaining wax residue.
- Rinse and Dry: Rinse the equipment with clean water to remove any soap residue, then pat dry with a clean towel. Ensure that all pieces are completely dry before reassembling or storing them to prevent mould and mildew growth.
- Sanitize if Necessary: For an extra level of cleanliness, you can sanitize your waxing supplies by soaking them in rubbing alcohol or a specialized disinfectant solution. Follow the manufacturer's instructions for dilution and contact time.
By following these simple steps, you can keep your Tress Wellness waxing supplies clean and hygienic, ensuring a safe and effective waxing experience every time.
Using Expired or Contaminated Wax
Using expired or contaminated wax can compromise the quality and safety of your waxing experience. Before each use, check the expiration date of your waxing products and discard any expired or questionable items. Additionally, avoid double-dipping your waxing spatula into the wax pot, as this can introduce bacteria and contaminants into the wax, increasing the risk of infection. Always use clean, fresh wax for each waxing session to ensure optimal results and minimize the risk of complications.
Conclusion:
Using a waxing kit at home can be a convenient and effective way to achieve salon-quality results without leaving the comfort of your home. By avoiding these common mistakes and following proper techniques, you can enjoy silky-smooth skin with your Tress Wellness waxing kit. Remember to patch test, prepare your skin properly, apply the wax correctly, pull the strips with confidence, and follow up with appropriate aftercare for the best results. With the right knowledge and technique, you can master the art of at-home waxing and say goodbye to unwanted hair for good.


